Friday, February 14, 2014

Tying in the master cylinder to the distribution block was next on the agenda of things to do after body mounting. Brake lines had to be bent, so once again out came the brake tools. This should be the last time they will be used. It was decided to eliminate the vibration coils in the two lines for a cleaner look. Now I know I will be crucified for this, but I don't think there will be substantial flexing between the body and frame to produce any line breakage. There is already enough movement in the lines so we will take that chance. It is something we will keep our eyes on. Enough said. Bending was straight forward using 5/16 and  1/4 tubing. 4 foot lengths were
purchased and one end cut off and re-flared after appropriate length was established. A double flaring tool was used to accomplish this. Mine is made by Oldforge, model 7203 http://www.etoolpros.com/automotive-tools/OLF-7203.html?gclid=CKqjtM-HzbwCFbB9Ogodi14AiA These can be picked up from various sources but don't by a dime store quality. Alot of forums I have read, indicated trouble in producing an centered double flare. The trick is in evenly chamfering the O.D. and I.D. Then when you insert the button in the tubing for the first bending operation it is critical that it is centered and straight. Look from both sides to insure this. It is also imperative that the screw clamp is centered on the holding bar. If it is not you will end up with an off centered flare. I also hit it with some WD-40 on both sides of the button for a smooth bend. On the second operation again make sure the screw clamp is centered. Oh and don't forget to put the fitting on first. It is also recommended that you should tighten the fitting down, loosen it and retighten for a no leak seal. Silicone brake fluid will be used for it's undamaging  to paint properties.

Thursday, February 13, 2014

After the body was bolted down we turned our attention to the shifter cable. Precisely on how to seal it where it went through the floor. Several ideas were bounced around, and we know there are special boots on various cars made for this purpose, and considering all the junkyards were snowed in jeffrey spotted a solution at are local hardware store in the plumbing department.It's called an adjustable toilet flapper.
and even though this is really an off the wall idea, it works exceptionally well. A thick washer just the correct size that I had on hand from a scrap part we make at my job (thanks Rick) was put to use over the rubber piece, bent to conform to the transmission hump, drilled then bolted down. The shifter cable was slid through it and makes a good flexible seal. I got my own ideas what the final results look like, but I'll let you form your own opinion. The console will have to get notched out for cable clearance, along with final adjustment for proper shifting.

Tuesday, February 11, 2014

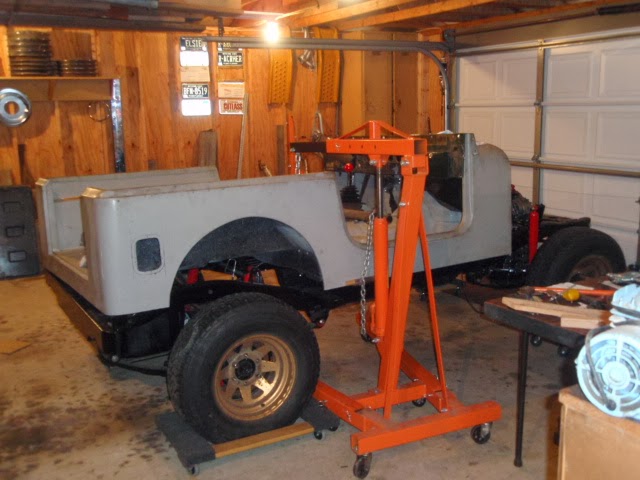
Time to put the body on the chassis. Jeffrey was home from N.Y. so he decided to take advantage of the time to do a little body building. No, not that kind. We had a few obstacles to overcome. One; 8" of snow with frozen ice on top, Two; a garage that was located down a hill in the back yard where the Jeep was housed and couldn't drive to, three; limited man power, four; a garage that you couldn't lift from the ceiling. I had previously made a lifting apparatus to lift the body for use in my basement shop with an
overhead trolley and chain hoist so with a cherry picker lift already in the garage a plan was formulated. As long as the cherry picker had enough lifting height we would be in good shape. The mover dolly's that were under the body are rated at 1000 lbs from Harbor Freight  http://www.harborfreight.com/movers-dolly-93888.html Not really intended to put under the four tires of the chassis but was worth a try. They actually have wheel dolly's for this purpose http://www.harborfreight.com/2-piece-1500-lb-capacity-vehicle-dollies-67338.html which is what I would recommend, but it did work. The
body was lifted and the chassis slid underneath. No clearance issues were encountered. The rubber body pucks were placed between the body and frame, body aligned and bolted down. We had previously cut these mounts and numbered their location when we had the body on before, so everything went together well. This will not be the final mounting of the body, (it will be off for paint) but was necessary for further fabrication where alignment and squareness of the body was crucial. The mounting of the body will create alot more fabrication work and alignment of other components wont be a problem. Some sort of running boards are
definitely going to be needed. With only a 2" suspension lift and no body lift, it's sitting pretty tall. The dollies aren't adding that much. Hoping it settles down as more weight gets added.