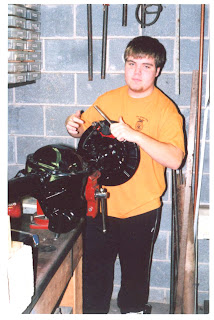
Assembly commenced on the rear rotors at the bench to make sure all our fabrication was honky dori, it seemed to be, so we took it back apart to lighten the load when it came time to hang it on the springs. I made up my own greasable shackle bolts by taking a stainless steel bolt and drilled a hole halfway down the length on a lathe with a #3 (.213) dia. drill which is the tap drill size for a 1/4-28 thread to accept a grease fitting. Then I milled 2 slots opposite each other along the length in the area covered by the urethane bushings with a carbide ball end mill. A crossed drilled hole was put in connecting the 2 slots with a #38 (.101) dia. drill at the position where the 2 bushings met, then tapped the end for the grease fitting with a 1/4-28 tap. The urethane
 bushings were cross notched where the 2 inside ends met, this will allow grease to flow through the bolt and to the inside and outside of the bushings. Everything I hear is that these bushings
 are prone to squeaking, so hopefully this will take care of that. The axle was then set on top of the springs, and as I was gathering the u-bolts, Jeffrey says something doesn't look straight. I figure, how can that be, but sure enough it was not straight. That's when you start to get this bad feeling in your stomache. Here it turns out that there is more than one hole on the bottom of the spring pads and one
  of them wasn't centered on the leaf spring bolt. I won't tell whose side it was, but I'm glad he spotted it before the u-bolts were torqued down. We then installed the u-bolts and sway bar and torqued them to spec. Slid in the axles and rotors, painted the caliper brackets red to stay with the performance image and thing were looking good. The calipers will also be painted red but didn't get them yet due to the fact I couldn't find them for under $75.00 apiece, and we didn't need them right away. Priority is to get this thing down on all fours. At this point I was curious to see how good a job I did welding the Isuzu ends on so I mounted a magnetic base to the frame with a dial indicator on the rotors and only had .005 runout, within the limits, so I was happy. Next we'll tackle the front housing.


