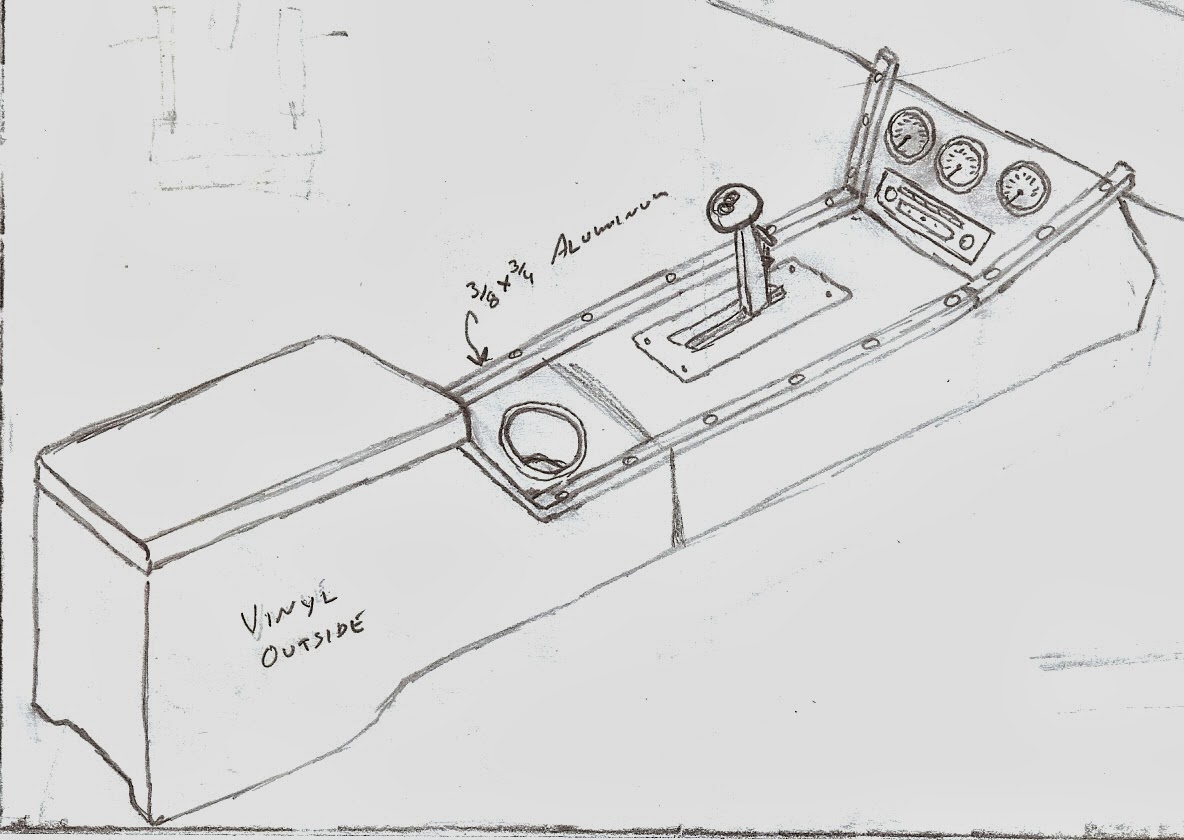
Alright, part 2 of the center console. Fabrication methods will be the same, but this round we will have a solid rear arm rest section to reference from. The rear section is 7" wide, this give ample storage and possibly 2 cup holders along with enough room to access the reclining knobs which are now in the center since we swapped drivers seat with the passenger seat for roll bar clearance. 7" isn't quite enough width to mount (3) 2 1/16" dia. gauges and a radio, so we widened it to 10" were it meets the
dash. This also helps to eliminate the boxy look. (I tried to talk Jeffrey into using military ammo boxes, but that didn't fly. If we were building a rat rod it would have been a go.) Anyhow the same procedures were used to mock up the sides and contour them to the floor and then transfer to the plywood. Angles from the 7" width to 10" was verified on the workbench and cross pieces cut and dadoed in. Test fitted the unit before gluing to make sure everything was honky
dory.
http://www.urbandictionary.com/define.php?term=honky%20dory 2 pins will be used at the junction of the front and rear pieces (now held by a vise grip) for location and the front will be bolted down like the rear. The forward section protrudes under the dash to make room for a radio, but caused a problem with the heater outlet for the CJ which is directed straight back. One for a 1987 to 1995 YJ has an outlet that will bolt up to the CJ heater box but is directed to both sides. J C Whitney also
carries this item.
http://www.jcwhitney.com/omix-replacement-floor-heater-duct/p2002935.jcwx along with other sources. The top of the console will be constructed out of plywood also along with sheet metal, painted to match the dash. The transition from the vinyl sides to sheet metal top will be hidden by a 3/4 x 3/8 steel or polished aluminum strip running the whole length on both top edges. We'll cover that fabrication later.


0 Comments:
Post a Comment
<< Home